Beginning to Till a Garden
While gardening, I discovered that till a garden goes beyond just plowing the soil. Before planting, it’s crucial to have the garden tilled thoroughly to create a nutrient-rich seedbed. Tilling soil – helps loosen, improves aeration, and allows water and nutrients to penetrate more easily to the roots.
So, if you’re wondering why bother with tilling, it’s all about giving your plants the best possible start. It also helps control weeds by disrupting their growth. Soil preparation should begin in the fall. At this time, you should:
- remove weeds;
- apply fertilizer;
- dig the soil to a depth of 9 to 12 inches.
In the spring, the soil should be re-digged or loosened to a depth of 6–8 inches before planting.
Tilling Soil: Preparation
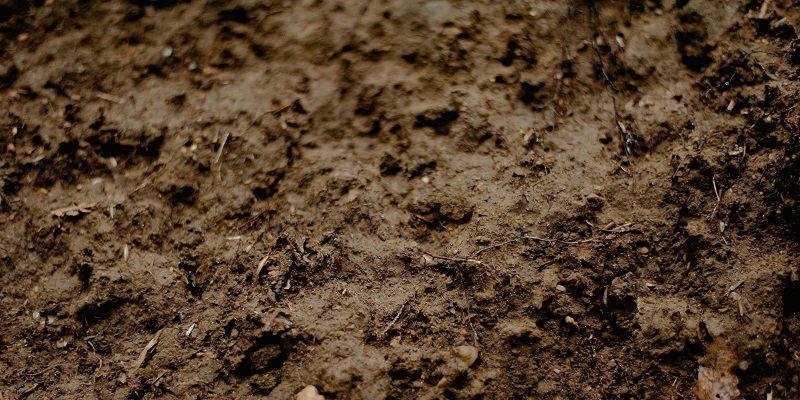
Soil Evaluation
In my experience, different soils have different needs. Sandy soil dries out quickly, while clay soil tends to retain water. Loamy soil is the best place, a balance of both.
In my garden work, I always advocate soil testing. I usually send a sample to the local extension service for analysis. They tell me the pH, nutrient levels, and any deficiencies. Based on these results, I make any necessary adjustments.
Soil acidity affects nutrient uptake by plants. The optimum soil acidity for most plants is 6.5-7.0. If the soil acidity is below 6.5, lime should be applied. If the soil acidity is above 7.0, peat should be applied.
Soil fertility can be determined visually. Fertile soil is dark in color and has a loose structure.
In my experience, it is best to assess the soil in the spring, before planting. This is because soil can be too dry in the summer and too cold in the winter.
- Heavy soils. Heavy soils are difficult to till because they are dense and do not allow air and water to pass through well. Heavy soils require heavy-duty machinery or tools.
- Light soils. Light soils are easy to till, but they dry out quickly and lose nutrients. Organic fertilizers should be applied to improve the structure of light soils.

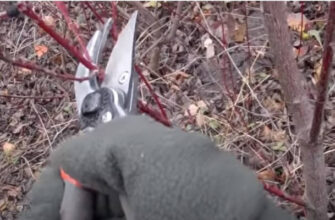
Weeds and Debris
Before you begin cultivating, clear the area of debris, rocks, and weeds. This ensures a smooth and efficient cultivation process.
I usually spend time identifying and removing weeds before plowing. The tilling process uproots all existing weeds, minimizing the likelihood of re-growth. This is a preventative approach to weed control that I find very effective. By eliminating weeds before tillage, I save myself a lot of hassle later on.
Weed removal can be done manually, with a shovel or a power tiller.
If there are few weeds, I usually remove them by hand. This allows me to remove the weeds most thoroughly without damaging the soil. If there are a lot of weeds, I use a power tiller. This allows me to remove the weeds quickly and efficiently.
I usually remove rocks, sticks, and any other obstacles that might interfere with the cultivator. It’s a simple step, but it smoother the tillage process and helps avoid unnecessary wear and tear on my tools.
In my experience, the best time to do soil preparation for tillage is in the fall. This is because the soil will have time to settle and compact over the winter.
When to Have Your Garden Tilled
Tillage is carried out in late autumn, after harvesting. It is aimed at improving the soil structure, killing weeds and preparing the soil for wintering.
In my experience, fall tillage should be deep. This will allow me to create optimal conditions for the growth and development of plants next year.
I usually dig the soil in the fall to a depth of 9 to 12 inches. I also apply fertilizer to the soil.
Spring tillage is done in the spring before planting. It is aimed at leveling the soil surface, removing weeds, and preparing the soil for planting.
In my experience, spring tillage should be superficial. This will allow me not to damage the roots of the plants. I usually loosen the soil in the spring to a depth of 10 to 6 inches. I also remove weeds.
Fertilizing
Garden-tilled soil provides the ideal foundation for the successful incorporation of organic matter, enhancing overall soil fertility.
In my gardening practice, I always add fertilizer while tilling the soil. This is a step I never skip. I usually add organics, such as compost or well-fermented manure, and mineral fertilizer.
This not only improves the soil structure but also adds valuable nutrients. I do this evenly over the entire plowed area, making sure the amendments are thoroughly incorporated.
The organic matter acts like a sponge, retaining moisture and nutrients for the plants. It’s a long-term investment in the health of the garden that I apply regularly.
- If you have heavy soils, incorporate sand or peat to improve soil structure.
- If you have light soils, incorporate compost or humus to improve their fertility.
In my experience, the best time to fertilize is in the fall. This is because the fertilizer will have time to decompose and be absorbed by the soil over the winter.

How to Till a Garden
What we need to do:
Digging is the most effective method of tilling the soil. By digging, the soil is mixed to a depth of 9 to 12 inches. Digging improves soil structure, enriches the soil with nutrients, and kills weeds. I usually turn the soil over in the fall.
On small plots, it is best to dig over the soil with a shovel or pitchfork. This allows you to better control the depth of digging and not damage the roots of plants.
Loosening is a less effective method of tilling the soil. Loosening mixes the soil to a depth of 4 to 6 inches. Loosening improves soil aeration and prevents crusting.
Breaking the Soil Into Beds
After you have applied fertilizer, you need to break the soil into beds.
The beds make it easier to care for the plants and harvest them. The beds should be 40–60 inches wide and 8–12 inches high.
In my experience, it is best to break up the soil into beds in the fall. The beds will have time to compact over the winter and become more stable.
Depth and Frequency
I usually aim for a depth of 6 to 8 inches, depending on the type of plants I plan to grow.
Tilling too deep can compromise soil structure, and not tilling deep enough may not solve compaction problems.
As for frequency, I do it when the soil is not too wet and not too dry. Tilling at the right depth and frequency creates an optimal environment for plant roots to spread and access nutrients.
Tillage Direction
I usually plow in straight lines not only for a neat appearance but also to avoid soil compaction. Tilling in the same direction every time helps maintain a uniform texture and makes it easier for plant roots to penetrate the soil.
Use of Machinery and Tools in Tillage
Gardeners often wonder about the best tools for getting the garden tilled efficiently without causing unnecessary soil compaction. I’ve gathered some essential tools and equipment to help you care for your garden. Each tool has been carefully selected with different aspects of garden care in mind.
5-Tine Heavy-Duty Pitch Fork for Gardening

The stainless steel forkhead is lauded for its resistance to rust and minimal sticking to soil. The extended head with double rivets enhances its durability by providing strength for tasks such as loosening, lifting, and turning gardening materials.
The T-shaped handle design is a thoughtful feature. As claimed, it reduces strain on the hand and wrist, making prolonged use more comfortable. The ergonomic design enhances the overall practicality of the tool.
The welded blade and boron steel shaft are durable. This fork seems to last longer than wood-handled tools and avoids the bending problems commonly associated with fiberglass alternatives.
The square tines, while not overly interesting, are practical for turning and cultivating soil. They are effective at tasks such as moving mulch, sod, yard debris, and digging up potatoes and perennials.
Honda VersAttach Cultivator Attachment
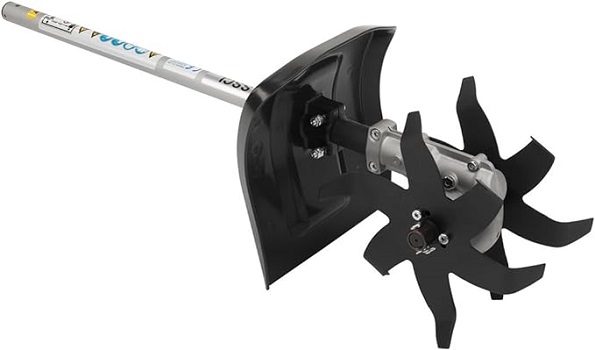
What stands out is its compatibility with the UMC425 and UMC435 Honda VersAttach power heads.
- Practicality extends to the attachment storage space as well. Every VersAttach attachment, including the cultivator, is equipped with a handy hook for convenient storage.
- As part of Honda’s exclusive VersAttach system, this cultivator is interchangeable with five other options: trimmer, pruner, hedge trimmer, pruner, and blower.
As for its primary function, the cultivator makes it easier to till a garden and aerate the soil, and reviews reflect that opinion.
Garden Weasel Cultivator and Hand Tiller
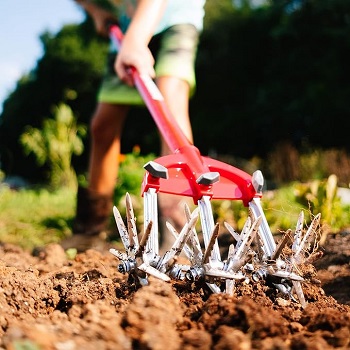
What I liked best was the simplicity and efficiency. The cultivator easily pulverizes the soil, cleaning itself with each revolution of the three interchangeable swivel cutting wheels. It’s a handy multi-tasker: aerating, weeding, and tilling simultaneously.
Using it is easy. Simply place the cultivator in the soil and move it back and forth. The design combines the functions of a hoe and a shovel without the need to bend or stoop. This results in less strain on the body, greater efficiency, and faster results.
The durability of the design is worth noting. Made of strong carbon steel, the tiller is resistant to rust and water. The rubberized handle provides comfort during use. It is also impressively lightweight, weighing less than 3 pounds, and comes fully assembled at 54 ½ inches long.
Troy-Bilt Gas Garden Tiller
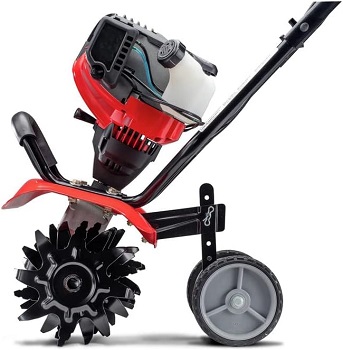
What I found practical about this garden cultivator is the 30cc 4-cycle engine. It runs cleaner and makes less noise compared to some alternatives. One notable advantage is that it is a 4-stroke engine, eliminating the need to mix gasoline and oil. This simplifies refueling and maintenance, which users often appreciate as mentioned in their reviews.
- A notable feature is the SpringAssist technology, which makes it easier to start the engine. Starting a cultivator can sometimes be a hassle, but this technology is designed to make the process smoother. The Prime & Go Starting System is a quick and easy two-stage starting mechanism.
- Another practical aspect is the adjustable tillage width: from 6 inches to 12 inches. This flexibility allows for various applications, making it adaptable to different gardening needs.
Mantis 2-Cycle Plus Tiller/Cultivator
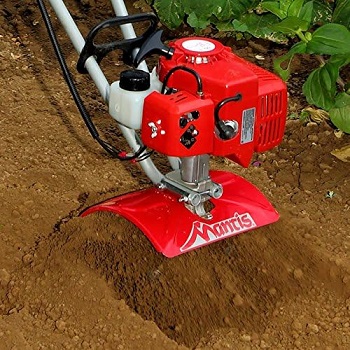
What stands out is the convenience it offers in terms of mobility. The tiller is equipped with a convenient carrying handle, and the entire unit weighs only 20 pounds. This makes it quite handy for transporting it around the garden or into storage.
Another practical feature is that the handles fold up for easy storage. It does not take up much space and you will appreciate this aspect, especially if storage space is limited.
- The dimensions of the product: 54 inches deep, 13 inches wide, and 40 inches high provide a compact design. It is not too large, making it easy to maneuver and work in small garden areas.
- Gas power enhances its practicality by eliminating the need for cords or access to electrical outlets. It provides freedom of movement without restrictions, and users often mention the convenience of a gasoline-powered power tiller in reviews.
- The two-year limited warranty is a smart addition, offering users a level of confidence and peace of mind.

The issue of choosing tools and techniques is often brought up in forums.
A quality cultivator, electric or gasoline, makes work faster and less tiring. A cultivator effectively turns and loosens the soil, suitable for cultivating small areas.
They are smaller and lighter than a power tiller, ideal for cultivating small areas, and are used to improve soil quality. They are used for surface tillage to maintain the soil property and structure. Cultivators are best for drying and leveling the soil, removing weeds, and smoothing the surface.
A cultivator allows you to apply fertilizer to the soil. This improves soil fertility and increases plant yields.
However, if you have a large plot of land, a power tiller will be a better choice. They have a lot of power, which allows you to cultivate large areas quickly and easily. A power tiller allows you to till the soil up to 12 inches deep.
Tilling the soil with a tractor is the most efficient way to prepare the soil for growing plants on large tracts of land. A tractor allows you to quickly and evenly till the soil up to 12 inches deep, saving you a lot of time and effort.
I usually opt for a sturdy garden fork and a sturdy shovel for hand tools. These are especially handy on smaller acreage where power tools can be overkill.

Hand-tilling is the most labor-intensive way to prepare soil for growing plants. However, this method allows you to control the tillage process and ensure a high-quality result. Hand tilling allows you to till the soil to a depth of up to 10 inches.
A shovel, pitchfork, rake, and hoe are all you need to work small areas of soil.
On gardening forums, users actively engage in sharing their diverse opinions and experiences regarding the use of various tools and equipment.
My gardening toolkit usually includes both hand and power tools, selecting them depending on the scale and nature of the tillage work.
Troubleshooting Common Problems
Soil Clods
In my experience, dealing with soil clods after tillage is a common problem. I usually solve this problem by breaking them up with a rake or hoe.
If clods persist, you may need to adjust the soil moisture. Adding some water and letting it stand before breaking up the clods usually helps. It’s a simple solution, and it keeps the soil texture suitable for plant root development.
Excessive Dryness or Moisture
In my gardening career, I’ve dealt with both excessive dryness and moisture in the soil after tilling. I usually combat excessive dryness by watering the area thoroughly and then tilling again.
With excessive moisture, I let the soil dry out a bit before tilling. It’s a delicate balance, and adjusting the moisture level ensures that the soil is perfect for planting. I use this technique and it helps create the perfect environment for my plants.
Post-tillage Care

Leveling the Soil
I usually level the surface and achieve a uniform and neat look. This not only improves the garden’s aesthetics but also helps distribute water. A level surface prevents water from pooling in one place and provides consistent moisture for all plants.
Watering and Settling
After tilling, I usually water the soil well. This helps the soil settle and eliminates air pockets created during tillage. I do this carefully, avoiding oversaturation. The goal is to encourage the natural compaction of the soil, providing a stable base for my plants.
Raised Bed Gardening
In my experience, raised beds provide a controlled environment for plants without intensive tillage. I usually build frames and fill them with a balanced mixture of soil and compost. This method provides excellent drainage, and aeration and allows for easy weed control. Raised beds are practical and visually appealing, creating separate growing areas that are accessible and manageable.
Conclusion
To summarize, tillage serves to create an optimal environment for your plants. It improves soil structure, improves drainage, and promotes better fertilizer uptake. Yields and the quality of your produce depend on how well the soil is tilled.
FAQ
When is the best time to till the soil?
In my experience, the best time to till the soil is in the fall. This is because over the winter the soil will have time to settle and compact. Fall tillage is aimed at improving soil structure, killing weeds, and preparing the soil for winter. Spring tillage is carried out in spring, before planting. It is aimed at leveling the soil surface, removing weeds, and preparing the soil for planting.
What equipment and tools should be used for soil tillage?
To cultivate small plots of land, manual labor or the use of a cultivator is sufficient. For cultivating larger plots of land, a tractor or plow should be used. In my experience, to cultivate small plots of land, I usually use hand tools such as a shovel, pitchfork, rake, and hoe. For cultivating larger areas of land, I use a cultivator.
What kind of fertilizer should I apply to the soil when tilling?
The following rules should be followed when applying fertilizer to the soil: Choose a fertilizer that is appropriate for your soil type and the plants you are growing. Do not over-fertilize as this can cause harmful substances to build up in the soil. Apply fertilizer evenly over the soil surface.