To sharpen garden shears at home you will need an bar with a fine abrasive or emery board, oil to lubricate the rubbing parts, as well as time and patience.
Every gardener knows that sharp garden shears are not just a tool, but a faithful helper, making work in the garden easy and enjoyable.
- With blunt shears, you have to exert more effort, which leads to quick fatigue and even injury.
- Instead of making a clean cut, they crumple and tear stems and leaves, damaging plants and leaving them vulnerable to disease.
- Sloppy cutting can lead to stunted growth and poor plant appearance.
Sharpening Garden Shears
You will need a sharpening stone with a grit of 150 to 400 grit. The choice of sharpening stone depends on the material of the blades and the desired result. A coarse grit sharpening stone is suitable for rough sharpening and a fine grit is for finishing.
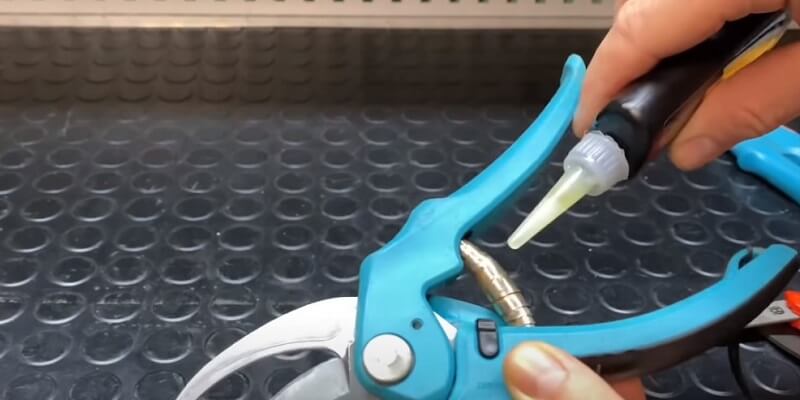
Lubricating oil helps protect blades from corrosion and prolongs blade life. A few drops of lubricating oil on the hinge and blades are helpful. Lubricating oil reduces friction, preventing premature wear, and ensures smooth cutting.
A blade lock, if available, will provide safety and convenience. A cloth for cleaning the blades.
What else you can use:
- File: Used for rougher sharpening, such as if the blades are severely dull or damaged.
- Sharpener: Provides quick and accurate sharpening, but requires skill to operate.
- Electric sharpener: A simple and handy tool, especially for beginners.
We’ll look at the most affordable and easiest options.

Preparing the Scissors
Before starting the sharpening process, you need to prepare your garden shears.
According to my experience, the following steps will ensure smooth and efficient sharpening:
If the design allows, disassemble the scissors by separating the blades from the handles. This will allow better access to the cutting edge during sharpening. Clean the blades of dirt, rust, and old grease with soap, brush, and rag.

Sharpening Process
Sharpening the blades is the most important part of the process.
Here’s the technique I’ve honed in my experience:
Secure the scissors. Use a vise or clamps to secure the scissors, giving them stability during sharpening.
Define the bevel. Most garden shears have a beveled edge. Identify this edge, as it is the one that needs sharpening.
Take one-half of the shears and run the cutting edge over the abrasive several times, keeping the blade at an angle of about 20° to the surface of the bar. Make sure the pressure is even.
Turn the blade over and repeat sharpening for the other side of the cutting edge. The number of passes over the emery board depends on how dull the blade is.
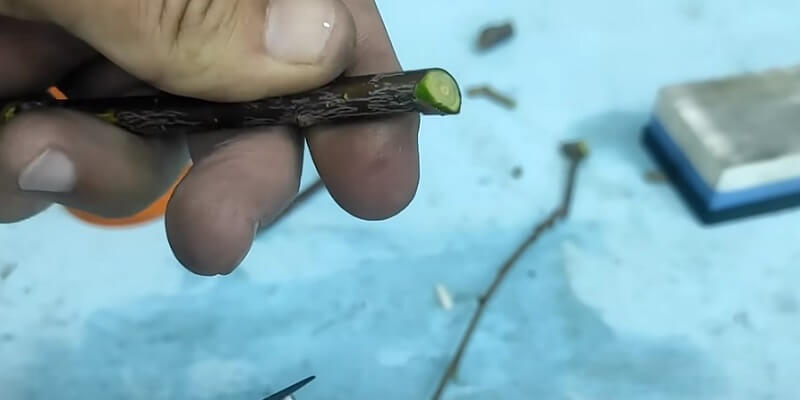
Check sharpness. After a few passes, check the sharpness by making a test cut on a small branch. Repeat the process until you achieve the desired sharpness.
Repeat the sharpening of the other half of the scissors in the same way if there is a cutting edge.
The angle of the stone: keep the sharpening stone at the same angle as the bevel, usually around 20 degrees. Maintain this angle throughout the sharpening process.
If you are unsure of the angle, run a marker along the beveled edge. As you sharpen, the marker will rub off, indicating areas that need more attention.
Even Strokes. Run the sharpening stone over the beveled edge with inconsistent, even strokes. Start at the blade’s base and work toward the tip.
Work each side of the blade the same number of times. Take care not to overheat the blade.
To achieve perfect sharpness, after sharpening on a coarse sharpening stone, finish the blades on a fine sharpening stone. This will make the blades smooth and sharp.
Lubricate the blades with oil while sharpening to reduce friction and prolong the life of the sharpening stone. Do not use the sharpening stone if it is clogged with metal shavings. Clean the bar regularly with a special cleaner.
Do not sharpen the inside of the blades where they touch each other. This will interfere with their proper adhesion.
Finishing and Lubrication
After sharpening, carefully clean the blades of metal dust and abrasive particles using a dry cloth. Then carefully inspect the cutting edges and if small burrs are found, remove them with a small file or file notch.
Next, apply a thin, even layer of oil to both sides of the blades to protect the tool from corrosion. Reassemble the shears and make a few working motions to distribute the lubricant evenly over the surface. Wipe off excess oil.
Angle of Sharpening Pruners
The sharpening angle varies depending on the type of garden shears.
For universal pruning shears, the optimum angle is approximately 25 degrees. This ensures the sharpness of the cutting edges and their necessary strength when cutting garden branches and stems. A flatter angle is suitable for heavy pruning shears to withstand high loads.
But it is better to use secateurs with a sharper blade of 20 degrees for neat cutting of flowers. In addition, the sharpening angle depends on the blades’ material – carbon steel allows you to make it smaller than chrome vanadium scissors.
| Pruners, and garden shears | 20-25 degrees to the plane of the blade |
| Lopper | 30-35 degrees |
| Grass shears | 40-45 degrees |
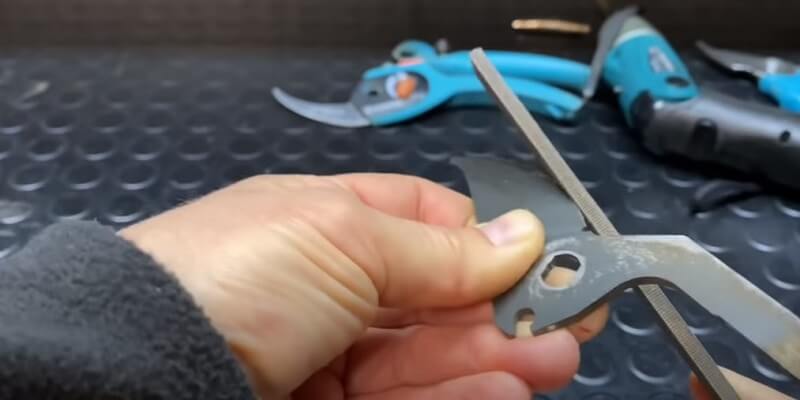
Sharpen the Scissors with a File
The file is used for rougher sharpening of garden shears. It is suitable if the blades are severely dull, damaged or chipped.
The file lets you quickly restore the blades’ shape and sharpness. But it also removes more metal than a bar, so it should be used carefully to avoid damaging the blades. It is unsuitable for finish sharpening as it can leave scratches on the blades.
A diamond file is recommended for sharpening garden shears. It is more gentle than a regular file and removes less metal. As when working with a bar, it is important to observe the correct angle of sharpening. It depends on the type of scissors.
Sharpening Technique
Work the file smoothly along the blade, from base to tip, until the blade is sharp. I recommend finishing sharpening with a fine grit sharpening stone to achieve perfectly sharp and smooth blades.
Tips: Keep in mind that the file can easily damage the blades if you are not careful. Take your time and work carefully. Lubricate the blades while sharpening to reduce friction and prolong the life of the file. If the file is clogged with metal shavings, clean it with a special cleaner.
Sharpening Machine
Machines with abrasive disks are suitable for sharpening garden shears.
- Corundum disks are universal and suitable for sharpening knives made of various materials.
- Diamond disks are more expensive but provide more precise and gentle sharpening.
When preparing an abrasive disk for sharpening garden shears, its grain size should be taken into account.
A coarse-grained disk (60-120) is required to restore severely dulled, damaged blades. It will quickly remove metal and restore the shape of the cutting edge.
For basic sharpening, the best choice will be a medium-grained disk (180-240) – it will ensure smoothness and sharpness of blades.
Then, for finishing, small irregularities should be eliminated after the previous stages using a fine-grained disk (320-600). Such a smooth transition from roughing to finishing sharpening will achieve ideal cutting properties of garden shears.
When starting to sharpen garden shears on an abrasive disk, it is necessary to properly fix the tool, setting it at the required angle to the surface of the circle. In the work process, press the blade gently, without excessive effort, making smooth movements and avoiding overheating the metal.
Sharpen both sides of the cutting edge alternately, aiming for an even finish. Lubricate the blade periodically to reduce friction and extend the disk’s life. Ensure the working surface is regularly cleaned with special compounds of metal shavings and dirt. This step-by-step careful sharpening guarantees perfect sharpness and longevity of your garden shears.
Electric Sharpener
The electric sharpener is the right helper for those who value time and ease of use. It allows you to quickly and effortlessly restore the sharpness of your garden shears.
- The choice of sharpening guide ensures precise blade positioning and even sharpening along its entire length. Choose a sharpener with a guide suitable for your type of scissors.
- Secure the scissors in the sharpener following the manufacturer’s instructions. Make sure the blade is at the correct angle to the sharpening element.
- Gently guide the blade through the sharpening element without using excessive force. Take your time and let the sharpener do its job. The number of passes depends on how dull the blades are. Generally, 2-3 passes are sufficient.
Tips: Oil the blades during sharpening to reduce friction and prolong the life of the sharpening element.
Sharpening with Improvised Means
While it’s best to use special tools like sharpeners or emery boards, they are not always at hand.
However, do not despair! Even without professional devices, you can sharpen the blades of scissors with the help of various improvised means. It is not so convenient, but it is quite realistic.
Sandpaper
Sandpaper is a simple and affordable tool that you can always find on hand.
- Sandpaper with a fine abrasive coating (150 to 600 grit). The optimal option is 220-240. Coarser sandpaper quickly removes the material, but less evenly.
- A flat and hard surface as a base to which the paper is attached (plywood, plastic, steel, etc.)
Attach it to a flat board and sharpen it carefully, controlling the angle and making even reciprocating movements.
Check the sharpness of the blade. Repeat sharpening if necessary. Finally, remove the abrasive residue from the scissors and oil the cutting edge.
Tips: Oil the blades while sharpening to reduce friction and prolong the life of the sandpaper. Do not use the paper if it is clogged with metal shavings.
Ceramic Сookware
Ceramic table ware is not only a table-setting tool, but also an unexpectedly effective helper in sharpening garden shears.
When using a ceramic plate for sharpening, take a plate with an unglazed edge made of dense ceramic without defects. Porcelain may be too fragile.
Secure the plate so that it does not move during the process. Carefully and leisurely drive the blade back and forth over the rough surface, maintaining a slight angle. Try not to press with force and make smooth movements.
Sharpen both sides of the cutting edge evenly without skewing. Wet the blade with water to reduce friction and overheating. This careful sharpening will prolong the shape of the scissors between professional sharpenings.
Safety Precautions
Safety should be a priority when sharpening garden shears.
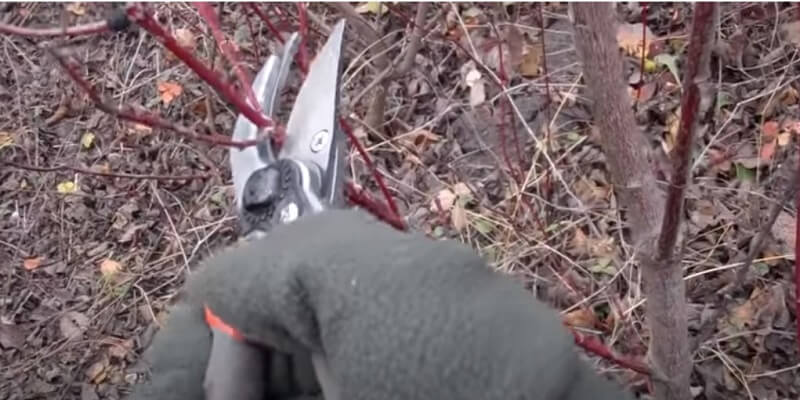
It is important to wear safety goggles to protect your eyes from flying sparks and metal particles. Gloves should be worn to prevent the tool from slipping out of your hands and causing cuts.
Special care is required when using electric sharpeners: strictly follow the operating instructions and not leave the device unattended.
When sharpening, be careful and smooth in your movements without undue haste. Only strict adherence to safety precautions will make sharpening work as safe as possible.
Tips for Keeping Garden Shears Sharp
Not only is it important to keep your garden shears sharp regularly, but it’s also important to follow several helpful tips to keep the cutting properties of the tool for as long as possible.
In my experience, regular inspection and cleaning are the foundation for keeping your garden shears sharp. This procedure will keep your shears clean and alert you to any problems affecting their performance.
After each use, clean dirt, plant sap, and resin from the blades.
Periodically disassemble the shears and clean the pivot mechanism. Remove dirt and old grease, and lubricate the joints with machine oil – this will make them easier to operate and prolong the life of the shears.
Do not use scissors to cut hard objects such as wire, nails, bones, or branches that are too thick.
Do not apply excessive force when working.
Check the sharpness of the blades regularly. If the cutting edges of the shears have significant wear or potholes, in addition to sharpening on a sharpening stone, additional leveling on a sharpening stone may be necessary. This will restore the evenness of the blades.
Try not to drop the scissors or scratch the blades against hard surfaces – this dulls the cutting edges. If this happens, resharpen the scissors immediately.
Inspect the blades for damage, cracks, or splinters – if found, the scissors should be professionally repaired or the broken blade replaced.
When choosing new scissors, favor well-known manufacturers. A quality tool will last a very long time with proper care.
Proper Storage
Hanging the shears or storing them upright prevents the blades from coming into contact with surfaces that can become jagged or dented.
It is useful to use protective covers, especially for long-term storage – this will protect against accidental external influences. Ensure that the scissors are completely dry before storing them, as moisture causes rust, which spoils their sharpness. Avoid storage in damp areas for the same reason. Also, place the scissors out of the reach of children for safety.
Frequency of Sharpening
The frequency of sharpening depends on the intensity of use, the type of material you are working with and storage conditions.
On average, it is recommended to sharpen:
| Secateurs | 1-2 times per season |
| Lopper | 2-3 times per season |
| Grass shears | 3-4 times per season |
For those who use shears less frequently, sharpening them every 4-6 months is sufficient.
Also, visually inspect the blades after each use. If you notice a decrease in cutting efficiency, the shears no longer cut but tear or crumple plants, orrequire more effort than usual. Jagged edges appear on the blades, then it may be time to touch up the blades.
Common Mistakes
Now we are not only talking about what to do, but also what to avoid.
In this section, I will discuss common mistakes and how to avoid them.
Applying too much pressure when sharpening
In my experience, one of the most common mistakes of gardeners is applying too much pressure during sharpening. It’s a common misconception that more pressure means a sharper edge. In reality, this approach can do more harm than good.
By applying too much pressure, you risk damaging the thin, beveled edge of the scissors. Instead of achieving a sharp blade, you may have uneven edges and an increased likelihood of nicks and chips. The key here is to apply gentle but consistent pressure.
Neglecting the pivot point and handles
Many focus solely on the blades when sharpening, neglecting important components like the pivot point and handles. The pivot point is what allows your scissors to open and close smoothly. If it is clogged with debris or not lubricated, your scissors will not perform optimally.
In my experience, handles are also very important. Loose handles impair control and cutting accuracy. Tighten all screws and bolts connecting the handles and make sure they move smoothly and without excessive play.
Supplemental Materials
Here are some good YouTube videos on sharpening garden shears. I hope these videos help you sharpen your pruning or garden shears as best as possible!
When Professional Help Should Be Sought
If your scissors have significant damage such as chipped or bent blades, professional services can provide comprehensive repairs.
Some scissors, especially high-end models, may require specialized equipment that professionals possess.
If you are unsure of your sharpening skills, seek professional help to get the job done right.
Conclusion
In conclusion, sharpening garden shears at home is a crucial skill that requires both technique and maintenance. It’s about knowing how to sharpen them and ensuring they are regularly inspected, cleaned, and stored properly. By incorporating these practices into your routine, you can prolong the lifespan of your garden shears and maintain their efficiency. When sharpening, it’s important to use the right tools and techniques to achieve the desired sharpness without damaging the blades. Remember to follow the angle of the existing bevel and apply consistent pressure along the entire edge. Don’t forget to oil the blades after sharpening to prevent rust and corrosion.
While sharpening at home can save you time and money, there are instances where seeking professional help may be necessary, especially for more complex sharpening tasks or if the shears are severely damaged. Knowing when to seek assistance is as important as knowing how to sharpen them yourself. Ultimately, by mastering the art of sharpening garden shears at home and maintaining them properly, you can ensure they remain sharp and efficient, allowing you to tackle your gardening tasks easily and precisely. Happy gardening!