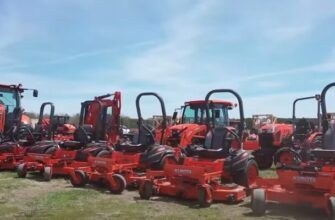
Hay raking is an agricultural practice used to collect cut hay from the field into rows, called windrows, for drying. This process is necessary to reduce moisture content and prevent spoilage. This is done using specialized equipment called hay rakes, which come in different types including wheel rakes, rotary rakes, and parallel rakes. These rakes are designed to gently lift and turn the hay with minimal damage.
Raking is usually done when the hay is partially dry but still contains moisture. The width of the windrows can be adjusted to optimize drying conditions. When the hay is sufficiently dried, it can be baled for storage, transportation or livestock feeding. In addition, the rake can prepare the field for subsequent harvesting or regrowth, depending on specific farming practices and objectives. The choice of hay rake and the timing of raking can vary depending on local conditions and equipment availability.
Why is proper raking of hay so necessary?
Proper raking ensures that hay dries evenly, reducing the risk of spoilage and preserving its nutritional value. With the proper methods and equipment, hay can be harvested and stacked efficiently, making it easier to transport and handle.
Whether you are a farmer or a hobbyist looking to make your hay, learning how to rake hay properly is essential to maximizing the quality and yield of your crop.
Let me walk you through the process step by step, sharing my insights and tips along the way.
Raking Hay: a Step-by-Step Guide
Raking hay is the most important step in the haymaking process to ensure proper drying, quality preservation, and easy baling. To help you master this important task, I have gathered information and tips from various reputable sources, forums, and the application of my own experience.
Prepare the Field
Before you start raking hay, make sure the field is clear of debris, rocks, or any other obstructions that could damage the rake or interfere with the raking process. Remove any large clumps of grass or weeds to create a level surface. You don’t want a hidden rock to ruin your rake or slow you down when you’re in the middle of raking.

Choose the Right Hay Rake
Choose a hay rake that meets your specific needs. Consider factors such as the size of your field, the type of hay you’re working with, the power of your tractor, and the quality of windrows you want. Wheeled rakes, rotary rakes, and parallel rakes are popular options.
For example, if you have a large field and want to cover a large area quickly, a rotary rake will work for you. On the other hand, if you have a small field with a narrow space, rakes with parallel bars may be more maneuverable.
What to Consider When Choosing a Hay Rake
Type of hay: Consider the type of hay you are working with. Different types of hay may require different rakes for optimal performance. For example, light and fluffy hay may benefit from using a wheel rake, while heavy or wet hay may require a rotary rake to effectively form windrows.
Field conditions: Evaluate the field conditions in which the rake will be used. If you have narrow spaces or obstacles, the maneuverability of a wheeled rake may be an advantage. Otherwise, if you have large fields with open areas, a rotary rake may be a better choice because of its efficiency and speed.
Bale size: Determine the desired bale size for your hay. Some rakes are designed to create windrows suitable for small square bales, while others are better suited for large round bales. Consider the compatibility of the rake with the baling equipment you will be using.
Farm size and equipment: Consider the size of your farm and the equipment you already have. If you have a small farm, a compact rake that can be attached to a tractor three-point hitch or pulled by an ATV may be more practical. For larger operations, a rake that can be towed behind a larger tractor is more suitable.
Durability and maintenance: Evaluate the durability and maintenance requirements of the rake. Look for high-quality construction and durable materials that can withstand the demands of your farm. Also, consider ease of maintenance and availability of replacement parts to ensure long-term reliability.
Budget: Determine a budget for buying a rake. Rakes are sold at a variety of prices, so it’s important to determine how much you’re willing to invest. Be sure to weigh the cost against the quality and features you need to make a cost-effective decision.
Seek expert advice: Consult local farmers, haymakers, or equipment vendors who have experience with different types of rakes. Their opinions and recommendations can be valuable guides in choosing a rake that meets your specific requirements.
Table 1: Rake Types and Their Benefits
| Rake Type | Benefits |
| Wheel Rake | Excellent for light and fluffy hay |
| Offers high maneuverability | |
| Can cover large areas quickly | |
| Rotary Rake | Well-suited for heavier hay or wet conditions |
| Provides efficient windrow formation | |
| Offers adjustable tine angles | |
| Side Delivery | Ideal for delicate or leafy hay |
| Rake | Minimizes leaf loss during raking hay |
| Produces clean windrows for baling |
Table 2: Pros and Cons of Different Rake Sizes
| Rake Size | Pros | Cons |
|---|---|---|
| 8-10 feet | Maneuverable in tight spaces | Takes more passes to cover large fields |
| Suitable for small-scale operations | Requires more time for raking | |
| 12-14 feet | Covers larger areas in fewer passes | Limited maneuverability in tight spaces |
| Increases overall efficiency | May be challenging to transport | |
| 16-18 feet | Excellent for large-scale operations | Requires a powerful tractor |
| Provides high productivity | Higher initial cost |
Table 3: Common Types of Hay
| Hay Type | Description |
| Timothy | Highly palatable |
| Rich in fiber and nutrients | |
| Suitable for horses and livestock | |
| Alfalfa | High protein content |
| Excellent forage for livestock | |
| Requires proper curing for storage | |
| Bermuda Grass | Drought-tolerant |
| Good for grazing and hay production | |
| Thrives in warm climates |
Adjust Rake Height and Width
Set the rake to the desired height and adjust the width to the desired swath size. This depends on the type of hay, weather conditions, and personal preference.
It is recommended to start with a moderate height of about 6-8 inches above the ground and width and adjust as needed. Generally, for light and fluffy hay, a higher rake height and the wider width is appropriate, while denser hay may require a lower height and narrower width.
Here are the main points to consider when adjusting rake height and width:
- Adjusting the height of the rake is necessary to avoid trapping excess soil or damaging the stubble of the hay.
- Adjust the height of the rake to the height of the cut hay. Ideally, the tines of the rake should be just above the ground, allowing them to pick up the hay without touching the soil.
Do not set the rake too low, as this may cause excessive soil contamination and increased wear on the rake tines.
- Adjusting the width of the rake ensures effective swath formation and field coverage.
- Consider the size of the swath required for baling or further processing. Larger rake widths produce larger swaths, smaller swaths produce smaller swaths.
- Evaluate field size and maneuverability of rake. Adjust rake width to field size and any potential obstructions or bottlenecks.
Remember that a wider rake may require more power and may not be suitable for all field conditions.
- Consider specific field conditions such as topography, slope, and obstacles.
- Adjust the height and width of the rake to account for uneven soil, rocks, or other possible obstacles.
Be aware of low or high areas of the field that may require different rake settings to ensure an even hay crop.
Table 2: Rake Adjustment Guidelines
| Rake Adjustment | Factors to Consider |
|---|---|
| Rake Height | Density and thickness of the hay |
| Ground clearance and field condition | |
| Teeth Angle | Windrow formation and hay preservation |
| Leaf retention and tine pressure | |
| Tine Pressure | Hay condition and desired windrow shape |
| Prevention of excessive leaf loss |

Raking Hay Pattern and Techniques
Raking hay is not a race, so take your time and maintain a moderate speed. Rushing the field can lead to missed hay, uneven swaths and potential damage to equipment.
Alternating rake passes ensure full coverage of the field. Aim for 50% overlap when each pass covers half of the previous swath. This technique helps avoid gaps and ensures that the hay is not left behind and ensures that all the hay is picked up and deposited in swaths.
When you reach the end of the row, make a wide turn to keep the swath shape constant. Avoid sharp turns as they can cause the hay to spill out of the windrow, creating a messy collection process.
Field conditions may vary, so be prepared to adjust your raking technique accordingly. If the ground is uneven or bumpy, increase the height of the rake slightly to avoid over-raking. On the other hand, if the base is smooth, you can lower the rake for a tighter collection of hay.
When raking, watch the wind direction. Raking against the wind helps the hay flow smoothly into the windrow and prevents it from being blown away. If the wind is strong and against the raking direction, you may need to make adjustments or rake another day.
Remember, practice makes perfect when it comes to the raking hay technique. Each field can present its own unique challenges, so be prepared to make adjustments and learn from your experience. With time and some skill, you will master the art of efficient hay harvesting and be rewarded with a bountiful harvest.
Working with Difficult Terrain and Obstacles
When raking hay, you often have to deal with difficult terrain and obstacles. Don’t be discouraged! A little know-how and getting things done will help you overcome these obstacles like a seasoned professional. Let’s take a look at some tips and tricks for overcoming difficult terrain and obstacles while raking hay.
Rake with bumps:
Rough or hilly terrain can pose a challenge while raking. But have no fear! Adjusting the height of the rake will help you get over those bumps without damaging your equipment or compromising the quality of your hay. Raise the height of the rake slightly to glide over uneven terrain, and lower it back down for smoother areas.
Struggle with those darn rocks:
Rocks seem to have a knack for hiding in the most awkward places, ready to destroy your rake. Watch out for them, especially in rocky fields, and avoid them if possible. If you encounter a particularly stubborn rock, slow down, maneuver around it or, if necessary, stop and remove it by hand to avoid damage.
Roots and ruts:
Roots and ruts can make raking difficult. Proceed slowly and confidently, allowing the rake to gracefully traverse these obstacles. Watch out for deep ruts, which can catch the rake’s tines and damage them. Adjust your speed and technique accordingly to maintain control and avoid any mishaps.
Ditch care:
Ditches and waterways can be a real headache when raking hay. Approach them with caution and plan your strategy in advance. If possible, rake parallel to ditches so the hay doesn’t fall into them. If you must cross a ditch, do so at a 90-degree angle for better stability and minimal loss of hay.
Problems with fences:
Fences can get in the way while raking, especially if they are close to the windrows. Be patient and maneuver the rake as close to the fence as possible without hurting it. Sometimes you may need to do a little hand raking near the fence to pick up stray hay that the rake didn’t get.
Weeds can be persistent little devils getting into your windrows and causing headaches. While raking hay, keep an eye out for weeds and do your best not to pick them up. If necessary, make a few extra passes to clear swaths and remove unwanted vegetation.
Remember that working with difficult terrain and obstacles is an integral part of the raking process.

Timing and Frequency of Raking Hay
Knowing when to rake and how often can make a big difference in the quality of your crop. So, let’s get into the intricacies of timing and frequency of raking your hay.
Hit it while it’s hot! Timing is everything, and that’s true for raking hay, too.
The ideal time to rake hay is when it has reached the right moisture level for baling. You want it to be dry enough to prevent mold and spoilage, but not too dry, as this can lead to leaf crumbling and loss of nutrients.
Watch the weather forecast carefully. Try to rake when there are a few sunny days ahead to ensure proper drying. Avoid raking if rain or high humidity is forecast, as this can negate all your efforts and worsen the quality of the hay.
Take advantage of sunny days to speed up the drying process. Rake your hay early in the day to give it enough time to dry before the evening dew sets in.
If the weather is favorable and you have a large field, rake in portions. Start with the areas that were mowed earlier than others, giving them more time in the sun, and gradually move on to the areas mowed later.
Fluffing up the hay before raking hay can speed up the drying process by exposing a larger surface area to the sun and airflow. The use of a tedder or hay tedder can help. These tools gently lift and spread the hay, allowing it to dry more efficiently.
The frequency of raking depends on various factors such as weather conditions, field size, and volume of hay. In general, it is recommended to rake every one to three days so that the hay is turned over and exposed to sunlight for even drying.
As you rake, keep an eye on the moisture content of the windrows. If the hay seems damp or cool to the touch, it may need extra time to dry. Conversely, if it seems too dry or brittle, you should reduce the raking hay frequency to prevent excessive leaf loss.
Control the Moisture Level
When raking hay, keep a close eye on the moisture level of the hay. The optimum moisture level for raking hay is usually around 35%.
The moisture can be checked by feeling the hay for dryness or by using a moisture meter. Adjust the raking schedule accordingly to ensure that the hay is properly dried before baling.
If the hay is too wet, it can get moldy, and hay that is too dry can lead to leaf loss and reduced nutritional value.
Farmers use specialized instruments called moisture meters to monitor moisture levels. These instruments give accurate readings and will allow for an accurate assessment of moisture content in the hay. The sampling technique involves taking samples from different parts of the field, including from several windrows and from different depths. This gives a complete picture of moisture levels in all hay.
Timing is very important when monitoring moisture levels. You should start sampling after raking and continue until baling. This will allow them to monitor the progress of drying and make any necessary adjustments.
If moisture levels are consistently out of the desired range(35-40%), raking and baling techniques may need to be adjusted. Fine-tuning the raking hay time and frequency can help achieve optimum moisture content for baling. It is important to note that hay with moisture content above the recommended range may be prone to heating and spontaneous combustion, which presents a safety risk.
Table 6: Hay Moisture Content Guidelines
| Hay Moisture Content | Description |
|---|---|
| 30-35% | Ideal moisture content for raking hay |
| < 30% | Hay may be too dry, increasing the risk of breakage |
| 35-40% | Optimal moisture content for raking hay |
| 40-45% | Hay may be slightly wet, slower drying process |
| > 45% | Hay is a too wet, increased risk of spoilage |
This table provides hay moisture recommendations to help you understand the ideal range for baling and storage.

Create Neat Swaths
While raking hay, focus on creating well-formed windrows. The swaths should be neatly aligned and free of clumps to facilitate the next steps in the haymaking process, such as baling or drying. Aim for uniform windrows that are easy to work with.
Regularly assess the quality of the windrows as you go along. Look for any signs of unevenness, excessive clumping, or other problems that could affect baling and drying.
If necessary, make changes in raking hay technique, speed, or equipment settings to ensure uniform, quality roll formation.
Remember that proper windrow formation forms the basis for successful hay baling. By paying attention to detail, following consistency, and adapting to field conditions, you will be on your way to producing high-quality windrows that will maximize your hay production efficiency.
Rake Cleaning and Maintenance
Take time after each use to thoroughly clean your rake. Remove accumulated debris, hay, or tangled branches. Regular maintenance is necessary for optimum performance and longevity of the equipment. Refer to the manufacturer’s instructions for specific cleaning and maintenance recommendations.
Storing and Baling Hay
Once you have successfully raked the hay, it is time to move on to the next important step: storing and baling. Proper storage and baling methods are very important to preserve the quality of the hay and ensure it is in good condition for future use.
When it comes to storing raked hay, choosing the right place is key. Look for a dry, well-ventilated place that is protected from outside influences. A barn or properly constructed hay shed may be ideal. Make sure the storage area is clean and free of pests that could damage the hay.
Before baling, it is very important to make sure that the hay has reached the desired moisture content. Aim for a moisture content between 15% and 20%. Pressing hay with too much moisture can lead to mold and possible spoilage, and hay that is too dry can become brittle and lose its nutritional value. Before you start, check the moisture content of the hay with a moisture meter.
When it comes to baling, you have several options depending on the equipment you have at your disposal. Usually choose small square bales, large round bales, or even baling. Each has its own advantages and considerations. Consider factors such as ease of processing, storage capacity, and feeding requirements when choosing the baling method.
Properly baled hay should be compressed tightly to minimize air circulation and reduce the risk of spoilage. This can be achieved by using the proper baling equipment and following the manufacturer’s instructions. Pay attention to the recommended parameters for bale density and tightness to ensure uniform and well-formed baling.
After baling the hay, it is important to store it properly. Stack the bales in a manner that allows proper air circulation to prevent heat buildup and mold growth. Stacking on pallets or using an elevator can promote air circulation.
Remember to check stored hay regularly for signs of spoilage or deterioration. Check for excessive heat, musty odor or visible mold growth. If you notice any problems, it’s important to address them immediately to prevent further damage to the entire hay stockpile.
Proper storage and baling of raked hay ensure a reliable supply of high-quality forage. By following these steps, you can protect your hay investment and be confident that the stored hay will provide the nutrients your livestock need.

My Experience Raking Hay, what Difficulties I Encountered, and What I Took Note of
Let me share with you my first-hand experience of raking hay and the difficulties I encountered along the way, drawing information from real farmers and forums. Being new to the field, I sought the advice of experienced people and learned valuable tips and advice.
When I started raking hay, I quickly learned that it was not an easy task. One of the main obstacles I encountered was tangled or stuck hay. Unraveling the hay from the tines of the rake can be tedious and time-consuming. To solve this problem, I turned to the wisdom of experienced farmers on the forums. They advised me to adjust the angle of the rake tines or use a rake with flexible tines to minimize hay clogging. This simple adjustment greatly improved the efficiency of my rake.
Another problem I encountered was the presence of rocks and debris in the field. These obstacles could damage the rake and interfere with its performance. On the advice of experienced farmers, I learned to scan the field before raking and manually remove any large rocks and debris. This preventative measure not only protected the rake but also ensured a smoother raking process.
Moisture content is another critical factor that needs close attention. Farmers advise raking hay when the moisture content is about 35-40%. However, ideal moisture levels can vary depending on climate and local conditions. Watching the weather forecast and using a moisture meter helped me determine the best time to rake hay.
In terms of efficiency, I discovered a helpful tip on a farmer’s forum. They recommended raking hay early in the morning when the dew has not yet fallen. The moisture from the dew can slightly dampen the hay, making it less likely to fall apart during raking. Not only did this tip improve the quality of the windrows, but it also made baling easier.
In addition, I found it helpful to pay attention to wind direction when raking. Discussions on the forum emphasized that raking against the wind can spread the hay, resulting in uneven windrows. By raking upwind, I was able to create neater and more compact swaths, which made baling easier.
Sharing my knowledge with real farmers was instrumental in improving my raking skills and achieving better results in the field.
Here are some popular forums where you may find discussions about raking hay:
HayTalk is a specialized online community for hay and forage enthusiasts. It features a wide range of hay-related topics, including a discussion of raking hay techniques, equipment recommendations, and tips shared by experienced farmers.
Yesterday’s Tractors is an extensive online forum for tractor and farming enthusiasts. In its extensive discussion forums, you can find topics related to raking hay. These topics often contain valuable information, personal experiences, and firsthand advice from farmers who know what they’re doing.
How to Round Rake a Hay Field?
Once or two days have passed since cutting your hay field, it is time to rake it for further drying. While the top hay in each windrow has already dried out, using a rake will turn over the windrow so the previously bottom hay also can dry out. Wait until the morning dew has disappeared from the surface before beginning your raking and ensure it dries quickly enough so it can be baled shortly after raking if possible; alternatively, tedder may help speed up drying times further than just using raking alone.
- Step 1: Adjust Rake Width
To accommodate for the volume and toughness of the hay, adjust the width of your rake according to its volume and toughness. A twelve-wheel rake could collect three windrows left by a nine-foot haybine; when light and quite dry hay needs raking together three windrows; however when heavy or tough hay needs more attention than that. - Step 2: Conjoin Windrows
Drive to the end of your field and select two or three straight rows. Lower your rake early enough so that it starts collecting at the beginning of each row, without being concerned about disrupting any head rows – they can always be fixed later! - Step 3: Tend to the Ends of Rows
It is best to save headland rows for later with this type of wheel rake. Furthermore, starting work in shaded areas may take longer for drying to occur. - Step 4: Collect Windrows
Drive your tractor along each row while monitoring the front end of the rake to make sure it picks up every windrow, not creating two separate rows and creating two distinct windrows that need separate tending. Adjustments may be required so stop as needed if necessary. - Step 5: Turning and Maneuvering
At the end of each row, raise your rake while turning around and then skip three rows for easier tractor/rake maneuvering. Lower it as you approach new rows to be raked; headlands can be addressed later. - Step 6: Raked the Perimeter Once you have completed raking straight rows, transition to headland rows along the perimeter. Rake in an anticlockwise motion as you circle around the field to prevent stopping and starting frequently – this approach will also aid when using the baler.
TIP: Use Your Tractor’s SCV Valve For Raking
If your tractor features an SCV (Selective Control Valve) valve with a floating arm rake float, connect the rake arm to it when using the SCV lever with a detent so you can freely move up and down arms of rake arms when unlatching it from detent position. Wet hay can then be sealed in plastic forage saver bags before being processed into haylage which can then be fed back onto cows as feed!
The Raking Process
Raking is an integral component of hay production that contributes to its quality. Proper raking ensures that all the hay has been turned one last time before being arranged into windrows for baling.
Setting the Rake:
- Before starting the raking process, it’s important to set the rake correctly. This prevents dirt and debris from contaminating the bales.
- The rake’s tines should be adjusted to skim just above the ground to prevent bending and wear while reducing maintenance efforts.
- Consult the operator manual of your specific rake for the best settings.
Optimal Dryness:
- Raking should be done when the hay is nearly dry to prevent mold and ensure proper curing.
- Raking too soon can hinder the underside of the hay from getting enough air and sun exposure.
- A “twist test” can help determine the dryness of the hay. If the stems break easily when twisted, the hay is cured.
Timing and Type of Hay:
- Raking should ideally be done during the late morning after the dew has dried and the sun is near its peak.
- Allowing at least two hours between raking and baling prevents dew moisture from affecting the hay’s underside.
- For leafy legumes like clover and alfalfa, avoid raking when moisture levels are below 35-40% to preserve valuable leaf material.
Raking Techniques:
- The type of rake used affects the timing of raking. Some rakes create fluffy windrows that can be raked before full drying.
- Wheel rakes or side-delivery rakes require complete drying before raking to avoid twisting and slow drying.
- Consistently sized windrows are essential for successful baling.
- Raking patterns depend on hay thickness and desired windrow size. Straight lines and gentle curves are recommended.
Raking Patterns:
- The windrow size should match the capacity of your baler to prevent leftover hay.
- Windrow paths don’t need to match the cutting path. Rake width often differs from the mower’s cutting width.
- When hay is thick, you may start with an outer row and spiral inwards to create uniformly sized windrows.
- For lighter cuttings, double, triple, or quadruple raking can be used to achieve desired windrow density.
Skill Development:
- Raking is a skill that improves with practice. Getting hands-on experience on the tractor is the best way to learn the process.
- Over time, you’ll develop an understanding of the process, making the transition from cutting to baling a natural progression.
Remember, mastering the raking process is essential to producing high-quality hay bales. Paying close attention to timing, dryness levels, rake settings and windrow patterns all play an integral part in its successful production cycle.
Conclusion
Mastering the art of raking requires knowledge, experience, and an openness to change. By following guidance from experienced farmers and using effective methods for your raking process, it should go smoothly and successfully. Remember to properly prepare the field, select an appropriate rake for each task, set appropriate height and width parameters and implement effective raking techniques for maximum success and efficiency.
Keep an eye out for difficult terrain and obstacles, choose the appropriate time and day to rake, and pay close attention to proper swath formation. Also keep track of moisture levels as well as storage/baling methods before considering equipment maintenance to ensure smooth operations for years to come. Taking these key considerations into account will yield fantastic raking hay results! So grab your rake, get out there, and begin your adventure raking hay!