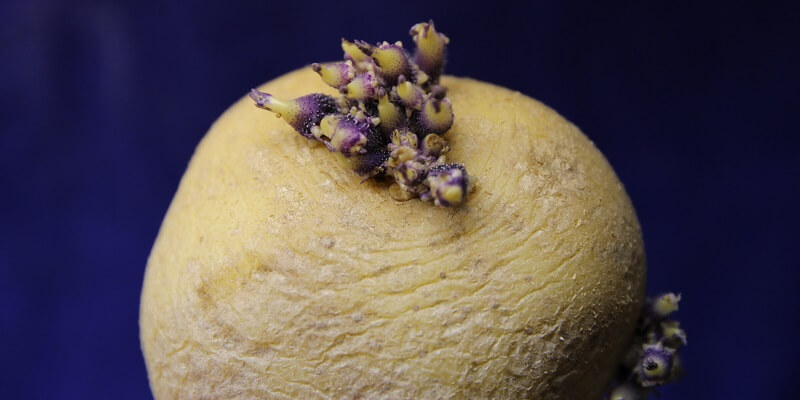
Planting and growing potatoes in your garden can be a rewarding experience, yielding a bountiful harvest of this versatile and nutritious tuber. To begin, select a sunny spot in your garden with well-drained soil. Potatoes thrive in loose, well-aerated soil rich in organic matter, so consider amending your soil with compost or aged manure to improve its texture and fertility. Before planting, preparing your seed potatoes by allowing them to sprout is important. This can be done by placing them in a cool, well-lit area for a few weeks until small sprouts, or “eyes,” begin to emerge.
Once your seed potatoes have sprouted, it’s time to plant them in the garden. Dig a shallow trench, approximately 4 inches deep, and place the seed potatoes in the trench, spaced about 12 inches apart. Cover the seed potatoes with soil, exposing just the sprout tips. As the potato plants grow, continue to mound soil around the base of the plants to encourage the development of additional tubers and protect them from sunlight, which can cause them to turn green and become bitter.
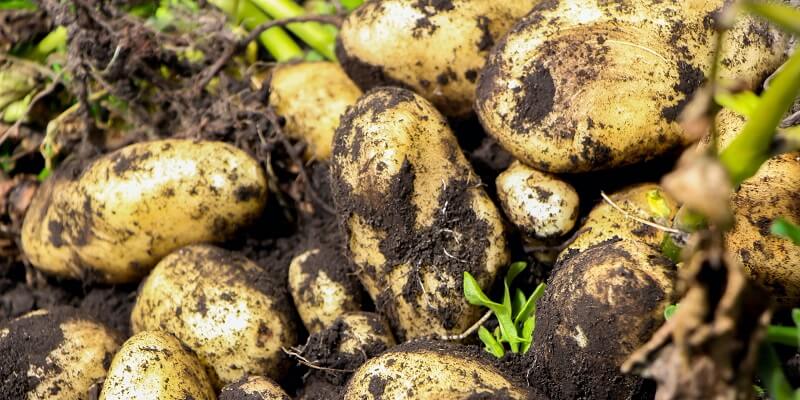
Throughout the growing season, potatoes require consistent moisture to thrive, so water them regularly, especially during dry spells. Additionally, watch for signs of pests and diseases, such as potato beetles or late blight, and take appropriate measures to control them. As the potato plants mature, you may notice the foliage yellowing and dying back, indicating that the tubers are ready for harvest. Carefully dig up the potatoes, being careful not to damage them, and allow them to cure in a cool, dark place for a few days before storing them in a cool, dry location for long-term storage. You can enjoy a plentiful harvest of delicious homegrown potatoes from your garden with proper care and attention.
To grow potatoes in the garden, you must prepare the soil, choose healthy seeds, and plant correctly for your region.
Potatoes are one of the most popular vegetable crops in the world. It is unpretentious in care but, at the same time, gives a good harvest. You need to follow some rules to grow a good crop of potatoes.
I have grown potatoes in my garden for many years and accumulated much experience. Today, I want to share my knowledge of growing potatoes in a garden.
Preparing to Plant Potatoes
To grow a good crop of potatoes, you must choose the right place and prepare the soil and seeds.
Choose Seed Potatoes
Many potato varieties differ in maturity, taste, disease, and pest resistance. For planting, it is recommended to choose varieties that are well adapted to local conditions.
Here are some tips to help you choose the right potato variety:
- Consider your climate. For growing potatoes in cold regions, early varieties that have time to ripen before the onset of cold weather are best suited. In warmer regions, you can grow varieties with later maturity dates.
- Consider the space available. If you have limited space, choose compact varieties, such as seedlings.
- Consider your personal preferences. If you like your potatoes fried in oil, choose varieties with a high starch content. If you prefer potatoes baked in the oven, choose varieties with a waxy texture.
Here are a few of my favorites among potato varieties:
Russets are a classic high-starch potato variety that is perfect for roasting. Russets have rough, reticulated skin and a fluffy interior.
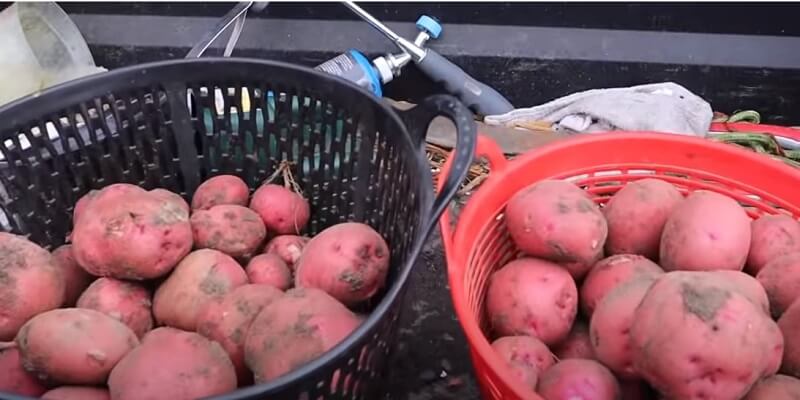
Red potatoes are a versatile variety that is suitable for a variety of cooking methods. Red potatoes have thin skins and a waxy texture, allowing them to hold their shape well.
Yukon Gold is another versatile variety that is suitable for mashed, baked, or fried. Yukon Gold has a golden, buttery flesh and thin skin.
Lead potatoes are firm potatoes with a nutty flavor that is ideal for frying. Fry potatoes come in a variety of colors and shapes.
Purple potatoes are a visually striking variety with bright purple skin and flesh. Purple potatoes contain antioxidants and add color to salads and side dishes.
When choosing potatoes for your garden, consider all these factors for a good harvest.
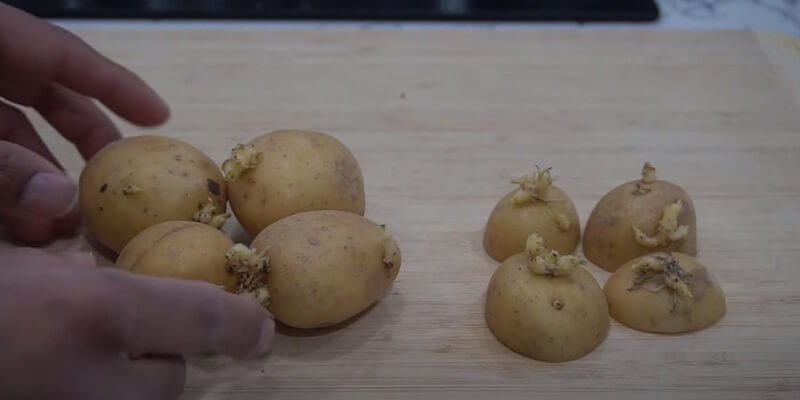
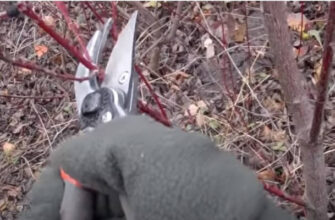
Separate the Eyes
Use a sharp knife or pruning shears to separate the eyes of potatoes.
Here are a few tips that, in my experience, will help you separate the eyes of potatoes without any problems:
- Choose medium-sized tubers with well-developed eyes.
- Cut the tubers into pieces so each piece has at least one eye.
- Carefully separate the eyes from the tuber using a knife or pruning shears.
- Rinse the selected eyes with water and dry them.
And mistakes to avoid:
- Don’t use a blunt knife or pruning shears to avoid damaging the eyes.
- Do not cut the eyes too close to the tuber, or they may not take root.
A week or two before planting, I place the potatoes in a bright place with a temperature of about 20 degrees Celsius. This stimulates the formation of sprouts, which will help the potatoes to take root more quickly after planting.
Treat the Cut Slices
One way to protect potatoes from disease and pests is to treat tuber cuts before planting.
My a few ways to treat potato cuttings:
Dressing. This is the most effective way to protect potatoes from diseases and pests. For mordanting, you can use special preparations purchased in stores. I recommend dressing if you are growing potatoes in unfavorable conditions, such as in regions with high humidity or pest infestations.
In my experience, dressing is the most reliable way to protect potatoes from disease and pests. I always use a dressing before planting potatoes, which helps me get a good harvest.
Treatment with manganese solution. This method is less effective than dressing but can also help protect potatoes from disease. To prepare the solution, dilute 1 gram of manganese in 1 liter of water. The cuttings are immersed in the solution for a few minutes.
I recommend using a manganese solution if you are growing potatoes in favorable conditions, such as in regions with dry and sunny weather.
Wood ash treatment. This method is also less effective than dressing but can help deter some pests. The cuttings are sprinkled with ash on all sides. I recommend using wood ash if you are growing potatoes in small quantities.
Which treatment method to choose depends on your preferences and capabilities.
Find the Right Place, Prepare the Soil
Potatoes grow best in light, loamy soils with good drainage.
Why this is important?
Compacted or clay soil can inhibit tuber development, resulting in suboptimal yields.
Loose, friable soil allows potatoes to sprawl and grow freely. This facilitates root penetration and promotes plant health.
Sand or other loosening materials can be added to the soil to improve soil structure.
It is also important to provide the soil with good drainage. This can be done by digging the soil to a depth of about 20 cm.
Potatoes are heavy feeders and require sufficient nutrients for optimal growth.
Why it is important?
Balanced soil rich in organic matter provides the necessary nutrition for vigorous potato plants.
A pH range of mildly acidic to neutral from 5.8 to 6.5 is appropriate. Extreme pH levels can lead to nutrient deficiencies. Acidic soil prevents the uptake of essential nutrients such as calcium, and alkaline soil can lead to micronutrient deficiencies.
Organic matter can be incorporated into the soil to improve soil fertility.
Substances such as compost, humus, and manure are important in improving potato yields. They improve soil structure, water permeability, and nutrient retention. In addition, organic matter promotes the development of beneficial microflora in the soil, which helps plants to absorb nutrients.
My recommendations for preparing the soil for potato planting:
- Dig the soil to a depth of about 20 cm. This will help improve soil drainage and aeration.
- Remove weeds; they compete with the potatoes for nutrients and moisture.
- If the soil is too dense, sand or other loosening materials can be added.
- If it is too acidic, you can add lime.
- If it is too alkaline, you can add sulfur.
- Add organic matter.
If you follow these recommendations, you can prepare the soil for planting potatoes and provide the plants with optimal conditions for growth and development.
How and When to Plant Potatoes?
Potatoes do well in cooler weather. Try to plant them in early spring when soil temperatures reach 45-55°F (7-13°C). Planting too early in cold soil can result in slow germination.
Make sure the threat of frost has passed before planting. Although potatoes tolerate light frosts, late spring frosts can damage emerging shoots. Planting when the soil is consistently above freezing minimizes this risk.
You may also consider planting potatoes in the fall in warmer climates with mild winters. This allows you to extend the growing season without the risk of frost.
The easiest way to determine if the soil is ready for potato planting is to measure its temperature. You can use a soil thermometer to do this. If it is expected to get colder in the next few days, it is better to postpone planting potatoes.
If you plant potatoes too early, they may freeze. If you plant potatoes too late, they may not ripen in time. Therefore, it is important to get the timing of potato planting right.
Step-by-step Instructions for Planting Potatoes
Now that your bed and tubers are ready, it’s time to dive into the potato planting process.
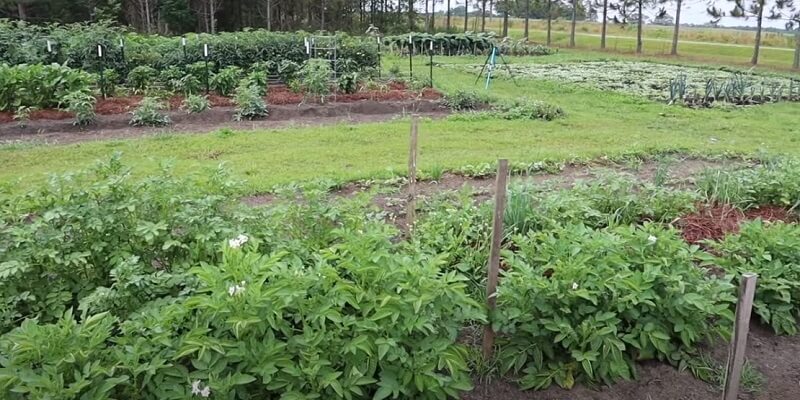
Proper Spacing and Planting Depth
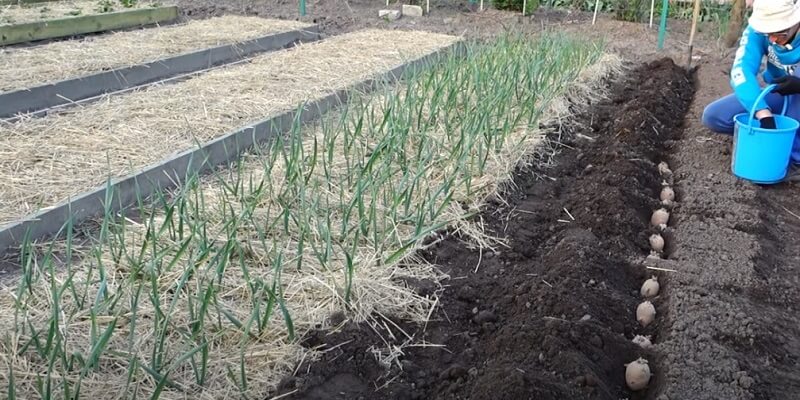
In the fall, apply compost or other organic material to the plot. In the spring before planting, dig the soil to a depth of about 8 inches (20 cm). Before planting, the holes should be prepared.
The holes should be about 4 inches (10 cm) deep and spaced 12-15 inches (30-38 cm) apart and 30-36 inches (76-91 cm) between rows.
Plant potatoes 12 to 15 inches (30-38 cm) apart, leaving about 30 to 36 inches (76-91 cm) between rows. Adequate space provides room for plant growth and allows proper air circulation, reducing disease risk.
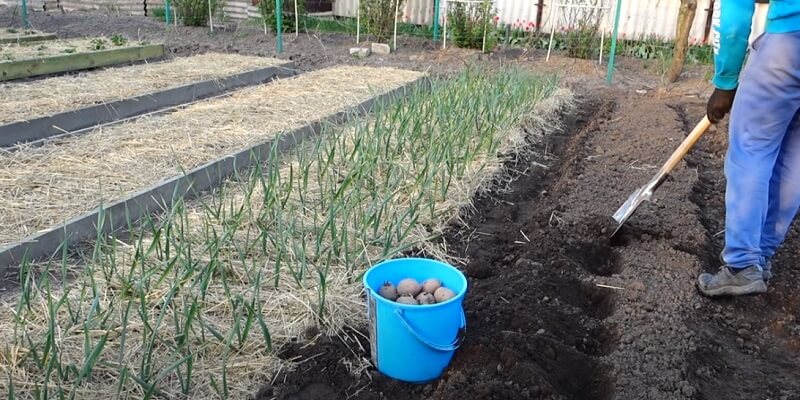
To prepare the holes, dig them with a shovel or power tiller. The holes should be level and deep enough so the tubers do not touch the soil.
Place the tuber in the hole with the sprout facing upwards. Fill the hole with soil and tamp down lightly. The ideal planting depth is 3 to 4 inches (8 to 10 cm). Deeper planting protects the emerging shoots from late spring frosts.
After planting, water the plantings to ensure the soil is well saturated with moisture. Potatoes require regular watering. Water your plantings every 7–10 days, depending on weather conditions.
Here are some additional potato-planting tips:
- If you are growing early varieties of potatoes, you can plant the tubers as soon as the soil warms up to 45 degrees Fahrenheit (7 degrees Celsius). Waiting until the soil warms up to 55 degrees Fahrenheit (13 degrees Celsius) is better for late varieties.
- If you are growing potatoes in cold climates, you can use mulch to protect the plants from frost.
- To prevent the spread of disease, do not plant potatoes in the same spot more than two years in a row.
Hilling Up Potatoes
As your potato plants grow, periodically hill up the soil around the base of the plants. This will protect the tubers from sunlight, which can cause greening and bitterness. Hilling also provides additional support to the plants.
In my experience, hilling should be carried out in two stages:
- The first hilling is carried out 2-3 weeks after planting. In this case, the potato stems are covered with soil to a height of about 4 inches (10 cm).
- The second hilling is carried out 2 weeks after the first. In this case, the potato stems are covered with soil to a height of about 8 inches (20 cm).
- Hilling can be done manually or using Hillers.
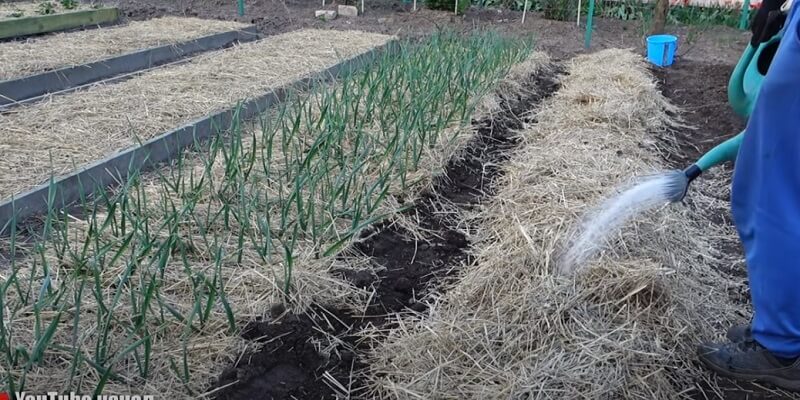
Mulching to Conserve Moisture
Mulching is a great way to improve your potato crop. It helps to maintain soil moisture, suppress weeds and regulate soil temperature.
In my experience, mulching should be done as follows:
- Apply a layer of organic mulch about 4 inches (10 cm) thick around the potato plants.
- Use mulch, such as straw, leaves, or wood chips, that will not decompose too quickly.
- Spread the mulch evenly over the soil surface so it does not touch the potato stems.
How to Water Potatoes
Potatoes need moderate watering. The planting should be watered every 7-10 days, depending on weather conditions.
The optimum soil moisture for potatoes is 70-80%. If the soil is too dry, the potato tubers will be small and unpalatable. If the soil is too wet, the tubers may rot.
In hot weather, potatoes should be watered more often than in cool weather. They should also be watered more often if they grow on light, sandy soils that dry out quickly.
The best time to water potatoes is early in the morning or late in the evening. The sun is not as active at this time, and moisture will not evaporate quickly.
You can use hand watering, hose watering, or sprinkling to water the potatoes.
When watering by hand, water should be poured under the plant’s roots to avoid getting water on the leaves. When watering with a hose, the water should be poured slowly not to erode the soil. When sprinkling, make sure that the water does not get on the leaves of the plants.
Potato Harvest
The moment you’ve been patiently waiting for is the time to harvest your home potatoes. This section will look at the signs that potatoes are ready for harvesting and the correct methods for digging them up.
As potato plants mature, the foliage begins to turn yellow and then brown. This is a clear sign that the plants are nearing the end of their growing cycle.
Gently dig around the base of the plant to check the size of the potatoes. They are usually ready to harvest when they reach the desired size for the particular variety you planted.
Wait until the potato skins have hardened. The skins become tougher at this point, providing better protection during harvest and later storage.
Correct Methods for Digging Up Potatoes
Moisten the soil before digging to make it easier to work with. Use a fork or shovel to loosen the soil around the plants.
Potatoes can be fragile, so handle them with care. Do not strike with the digging tool as this can damage the tubers.
Start digging from the outer edges of the plant and gradually work your way towards the center. This prevents accidental damage to the potatoes with the digging tool.
You can harvest potatoes with a shovel, a pitchfork, or a potato digger.
If you use a spade, dig the tubers to a depth of about 20 cm.
Using a pitchfork, gently pick up the tubers and dig them out.
If you use a potato digger, set it to a depth of about 20 cm and start it. The potatoes will be dug out and collected in a box or basket.
When to harvest the potatoes
Potatoes can be harvested 80-100 days after planting.
However, harvest time can vary depending on the potato variety, climatic conditions, and other factors.
Here are a few signs you can tell when potatoes are ready to harvest:
- Potato leaves begin to yellow and dry.
- Potato tubers reach maturity and have a hard skin.
- Potato stems break easily.
If you doubt whether the potatoes are ready for harvesting, dig up one tuber and check its maturity. The potato is ready for harvesting if the skin is firm and does not break when pressed.
After harvesting, the potatoes should be dried in the sun for a few days. This will help get rid of excess moisture and prevent the development of diseases.
Potato Storage
Potatoes can be stored in the cellar or basement. A well-ventilated place with an air temperature of about 2-4 degrees Celsius should be chosen for storage.
Before storage, potatoes should be cleaned from the ground and dried. Tubers with mechanical damage should be rejected.
Potatoes can be stored in crates, baskets, or bags. Crates and baskets should be ventilated. Bags should be made of breathable material.
Potatoes should be stored in the dark. Light can promote the sprouting of tubers.
Potatoes can be stored for up to 6 months. However, over time, they lose their flavor and nutritional properties.
Potato Disease Prevention
Potato blight, also known as pulling disease, is a bacterial disease that affects potatoes. Bacillus mesentericus and Bacillus subtilis cause it. These bacteria are present in the soil and can be transmitted from diseased to healthy plants.
Potato blight manifests itself as the softening and rotting of the potato crumb. Tubers become stringy and develop an unpleasant odor.
Potato blight can cause serious damage to the potato crop. It can lead to reduced yields and deterioration of product quality.
To prevent potato blight, the following measures should be followed:
- Use healthy seed material. Before planting, etch the tubers with special preparations, which can be purchased in specialized stores.
- Observe crop rotation. Do not plant potatoes in the same place for more than two years.
- Provide good drainage. Excess moisture promotes the development of bacteria that cause potato disease.
- Remove weeds regularly. Weeds can be a source of infection.
- Harvest your crops promptly. Do not leave potatoes in the field after the onset of cold weather.
- Store potatoes properly. Store potatoes in a cool and dry place.
Here are some additional tips to prevent potato blight:
- Use potato disease-resistant potato varieties.
- Till the soil before planting potatoes. Copper sulfate or boric acid solutions can be used.
- Conduct preventive spraying of plants. You can use copper sulfate, boric acid, or other fungicides.
If you notice signs of potato disease, it is necessary to take measures to eliminate it. Diseased plants should be removed from the field and burned. The remaining plants should be treated with fungicides.
Disease Detection
As potato plants grow, it is important to be vigilant against potential threats. Our job is to protect our potato crop from diseases and pests in time.
Here’s what you may encounter:
Early blight- Look for dark spots with concentric rings on the leaves. Phytophthorosis can reduce yields and weaken plants.
Prevention: follow crop rotation, ensuring potatoes are not planted in the same spot for several years. Apply fungicides early in the growing season as a preventative measure.
Late blight- Phytophthorosis, detectable by water-soaked lesions on leaves, can spread rapidly, causing extensive damage.
Prevention: Provide good airflow by spacing plants appropriately. Apply copper-based fungicides prophylactically, especially during wet periods.
Potato patch- Rough, scaly spots on potato peels characterize potato patch, which affects the appearance but not the edibility of potatoes. Prevention: Maintain soil pH at 5.8-6.5. Avoid excessive use of manure, as parsha bacteria thrive in conditions high in organic matter.

Organic Pest Control
Colorado potato beetle – Adult beetles are yellow-orange with black stripes. Larvae are reddish with black dots.
Control measures: Collect beetles and larvae regularly by hand. Neem oil and insecticidal soap are effective organic options.
Aphids – Small, pear-shaped insects on the underside of leaves. Management: Encourage natural predators such as ladybugs and lacewings. Spray plants with a mixture of water and mild soap.
Wireworms – yellowish-brown, thin larvae resembling wireworms. Control measures: rotate crops to interrupt the wireworm life cycle. Use potato varieties that are less attractive to wireworms.
Useful Video
Planting potatoes is an affordable and rewarding activity suitable for both experienced gardeners and those taking their first steps in home gardening. The reward is not only the potato harvest, but also the satisfaction of growing your food.
If you have already started growing potatoes or are planning to start, I invite you to share your experiences. Your ideas, challenges, and triumphs can inspire and guide others in their gardening journey.
Get your hands dirty, watch potatoes thrive, and enjoy the joy of growing a piece of nature in your backyard. Enjoy gardening!
FAQ
Can I grow potatoes in a raised bed?
Yes, potatoes can be grown in raised beds with well-drained soil. Make sure the beds are deep enough to accommodate the growing tubers.
Is there a recommended method to prevent sunburn of potatoes?
Tilling the soil around the base of potato plants helps prevent sunburn of the tubers by sheltering them and providing extra support.
Can I reuse potatoes from my kitchen to grow new plants?
You can use sprouted eyes or peels to grow new potato plants. Make sure the sprouts are healthy before planting.
What are common problems in growing potatoes, and how can I solve them?
Proper spacing, crop rotation, disease-resistant varieties, and organic pest control can solve problems such as phytophthora, potato patches, and pests.
Do potatoes need a lot of sunlight?
Yes, potatoes prefer sunlight. Get at least 6-8 hours of direct sunlight daily for optimal growth.
Can potatoes be grown from a potato?
Yes, you can grow potatoes from potatoes. Potatoes are propagated vegetatively, i.e., from tubers. A potato tuber is a modified shoot that contains a reserve of nutrients and water. When a potato tuber is planted in the soil, sprouts sprout from the tuber to form the rhizome and the above-ground part of the plant.
Conclusion
In conclusion, planting and growing potatoes in your garden can be fulfilling and rewarding. You can cultivate a plentiful harvest of this versatile and nutritious tuber by selecting a sunny spot with well-drained soil, preparing your seed potatoes properly, and providing consistent care throughout the growing season. Whether you’re a seasoned gardener or just starting, growing potatoes offers a hands-on opportunity to connect with the earth and enjoy the satisfaction of harvesting your food. So roll up your sleeves, dig in the dirt, and enjoy the journey of planting and growing potatoes in your garden. Happy gardening!